 PhotoCargo
First, what counts as “all”?
A complete download means the full-resolution originals: HEIC or JPEG photos, videos at their recorded quality, both halves of each Live Photo, and both files of a RAW + JPEG pair. Smaller versions, which iCloud keeps on devices with Optimize Storage, are not your photos; they’re previews.
Option 1: Photos on your Mac
- Open Photos, choose Photos › Settings › iCloud and select Download Originals to this Mac.
- Wait. Photos downloads in the background; a large library can take days. Keep the Mac plugged in and online.
- Everything now lives in your Photos library on the Mac. To get files you can copy elsewhere, select items and choose File › Export › Export Unmodified Original.
The catch: the entire library must fit on your Mac’s internal storage, alongside everything else you keep there.
Option 2: iCloud.com
- Sign in at iCloud.com and open Photos.
- Select items. Apple lets you select up to 1,000 at a time.
- Click the Download button. For originals, use the More menu’s download options and choose Unmodified Originals. The download usually arrives as a ZIP file to unpack.
Repeat in batches of a thousand. It works on any computer, including Windows, which makes it the right choice when you’re not at your own Mac.
Option 3: Ask Apple for a copy of your data
At privacy.apple.com you can request a copy of the data in your Apple Account, including your photos and videos in their original formats. Apple prepares it, which can take a while, and notifies you when it’s ready; you then have 14 days to download it. It isn’t offered in every country or region, can’t be limited to a date range or repeated for only the new items, and you unpack and check the files yourself.
Option 4: PhotoCargo, straight to your drive
- Open PhotoCargo and connect Photos. Connect an APFS-formatted external drive.
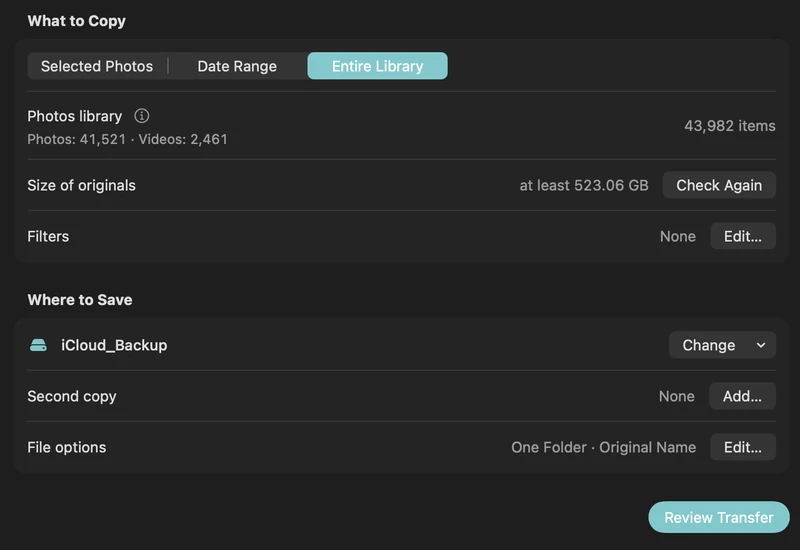
- Choose Entire Library (or Date Range if you’d rather go year by year), pick a folder on the drive, and click Review Transfer.
- Click Copy and Verify. Each original is downloaded from iCloud as needed, written to the drive and verified. Set a free-space reserve for your Mac; Photos manages its own cache, so temporary Mac storage is still needed.
If your internet drops or you need the Mac for something else, pause or quit; the transfer continues later from the first unfinished item. Later, Find New Items downloads only what was added since. Read the full walkthrough in Back up iCloud Photos to an external hard drive.
Which one should you use?
| Photos (Download Originals) | iCloud.com | Apple data copy | PhotoCargo | |
|---|---|---|---|---|
| Needs the library to fit on your Mac | Yes | No | No | No |
| Limit per run | None | 1,000 items | None | None with Unlimited |
| Live Photos as photo + video | Yes | Yes | Yes | Yes |
| Verifies every file | No | No | No | Yes |
| Resumes after an interruption | Partly | No | No | Yes |
| Copies only what’s new next time | No | No | No | Yes |
For a few hundred photos, iCloud.com is fine. For your whole library, use a method that doesn’t depend on your Mac’s free space and that checks the result.
Keep exploring
How to back up iCloud Photos to an external hard drive (Mac)
Copy your iCloud Photos originals to an external HDD or SSD on a Mac, even a library bigger than your Mac: PhotoCargo, Photos export, iCloud.com and moving the library.
Read the guide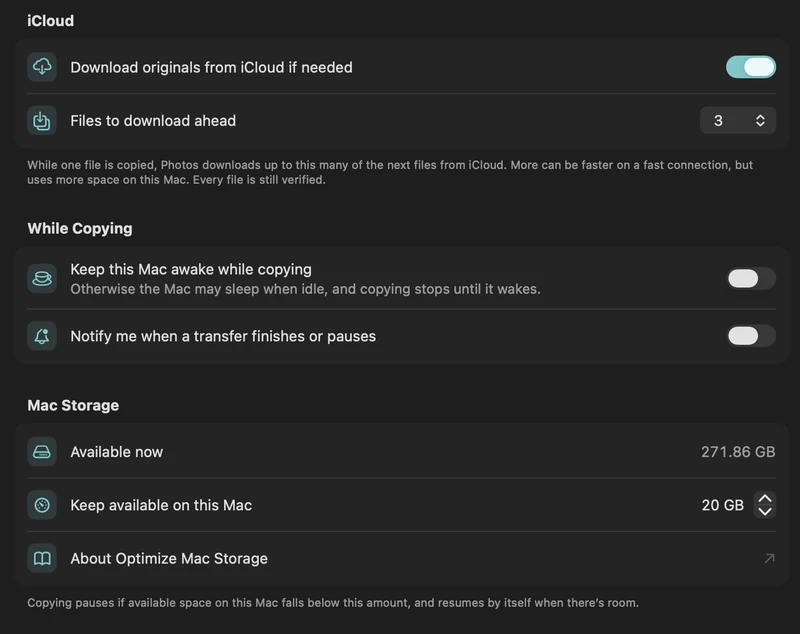
Optimize Mac Storage explained: where your original photos really are
What Optimize Mac Storage does to your Photos library, why library copies and Time Machine can end up with previews, and how to get the originals onto your drive.
Read the guideCopy a large iCloud library with limited Mac storage
Plan a transfer larger than your Mac’s free space with on-demand originals, a free-space reserve and controlled download-ahead.
Read the guide

